
Unreal Engine
Interfaces

In this lesson we learnt about the importance of interfaces and how top implement them.
Interfaces are useful for ensuring that a set of unrelated classes implement a common set of functions with out overriding data and making the code run smoother. To create an interface : create a new blueprint and name it as an interface blueprint, add the new input to the 'First Person Character' blueprint and compile.

I found this topic simple since it help with creating bigger games by merging all code into one code setting. To improve i would like to see how a big game that needs interfaces runs with and without them to see there huge importance.
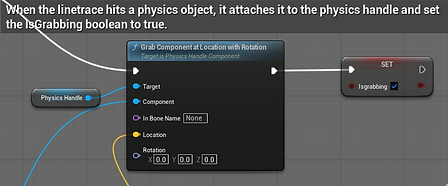
Then following the coding we connect the 'Line Trace By Channel' to the interface code to make it connect throughout the program. Next, add a 'Branch' and a 'Break Hit Result'. With the 'Branch' connect it with a 'Sequence' and make it true ; with the 'Sequence' create one 'Interact' connection and a 'Grab Component At Location With Rotation' connection. Make the 'Interacts' named actor connect to itself and make the 'Grab Component At Location With Rotations' target have a physics handle. With the 'Break Hit Result' Connect the 'Hit Actor' and 'Hit Component' to the'Grab Component At Location With Rotation' to the 'Component' tab. Lastly, create a 'Get World Location' tab and connect it the the 'Hit Component' and the 'Return Value' to 'Location' then create a 'Set' tab and fully connect it to the 'Grab Component At Location With Rotation' and set it to true
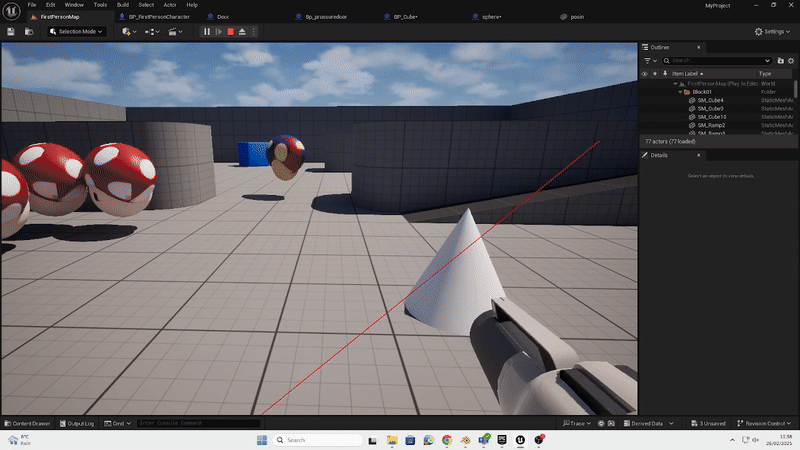
Line Traces
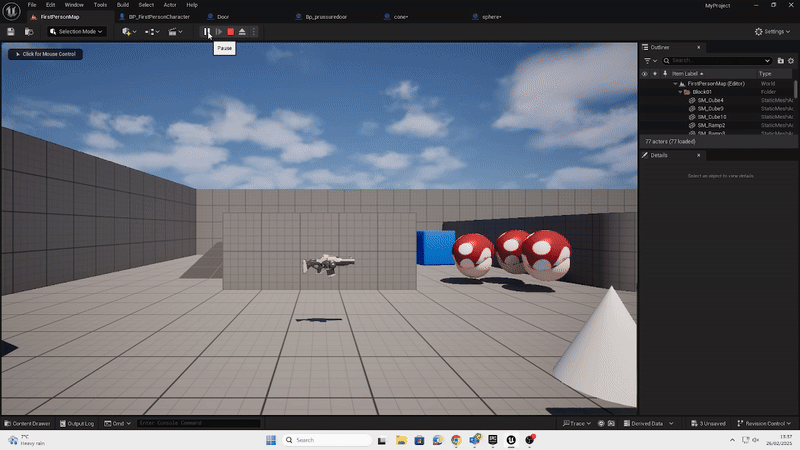
In this lesson we learnt how to make object intractable with line traces

To make any object intractable for pick up you need to add line tracing. You create 'First Person Camera' tab and connect it to both a 'Get World Link' and 'Get Forward Vector' and connect both by 'Targets' Add a 'Line Trace By Channel' and connect both of the 'Return Values'. The 'Get World Location' to the 'Start' and the 'Get forward Vector' to an add and times tab to the 'End' By also adding a 'Show debug Command' you see the red line trace along an object showing its working. If done correctly you should be able to use the 'E' key to pickup the gun as seen below.
This task was extremely easy due to the simple code and making the game more interactive just by being able to pick up. To improve I would like to use this mechanic to make a puzzle 3D game.
Physics

Today I implemented physics to my blocks to create a more realistic game.
What are we going to use this blueprint for?To make a physics puzzle I need to implement physics I want to interact with. Add a physics handle to my character at the end of the line trace. And finally check to the location of the physics handle every frame and update it. Using physics adds complexity and a new way for players to interact with the game world. Requiring players to think and use new strategies to solve puzzles. By learning to use 3D physics I learn how to strategies with obstacles and new paths to make any game entertaining.
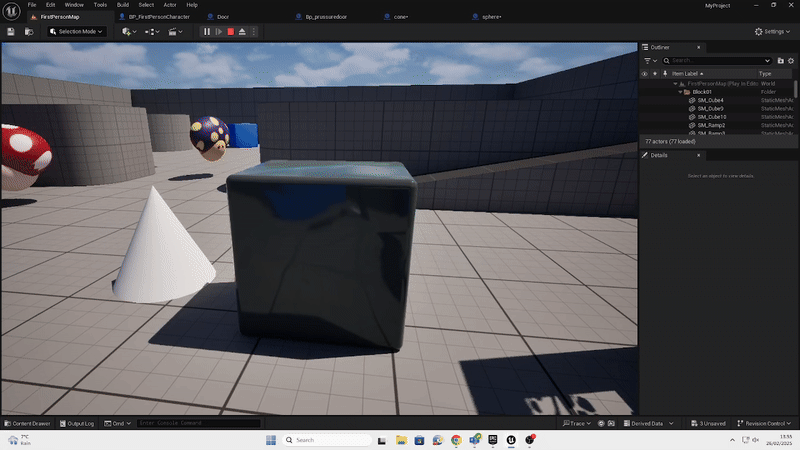
Implement physics is simple when you follow the codes below and adapt them into you game engine. To add physics handle to a player character you have to use a blueprint and use the line tracing code , which is easier when you implement the interfaces. Add a boolean variable named 'IsGrabbing' and set to false by default to make it only applicable when the line trace 'E' is active. Also adding a 'Physics Handle' is necessary for this to work so add that in the players variables. When the line trace hits a physics object it will use the code mentioned in the Line Tracing slide and copy the same code, making the player be able to pick up the cubes.
The you have to update position with physics handle every tick (frame) we do this so the held object will stay in place in front of the player and to be able to easily fling away from the player if thrown. One issue I faced was that the player would holding onto the cube to fix this I had to implement this code below ' When 'E' is released, check if IsGrabbing is true, it is release object from physics handle.' to release.' E' release object is released. Doing this also allows you to hold E to hold objects instead of just one button press. This now allows the player to pick up and drop the cube and to throw it away like the video bellow demonstrates


I found this topic quite easy due to the simple coding and fun game play it brings. To improve I want to make a simple game showing of how using physics can help improve a game.
Keycards
In today's lesson I learnt how to make doors only open by using keys/key cards.
To create working key cards you have to follow the step bellow. Create a new node called the 'Enum' can create a new door type. Make new variables called 'Keys', 'Keyone''Keytwo' and 'Keyring' then create a new blueprint actor called 'BP_Keys' and make a static mesh.Add the interact with key code in the 'BP_Keys' so when 'E; is pressed on the mesh it will be in inventory and disappear. In the custom door blueprint due to interfaces its copied the animation open and close we used for the door so underneath write the following code. Make the code to check if the door is either locked or not. If it is locked it will not open and state ; Door is locked' to the player, if its unlocked the door will open when 'E' is pressed. To unlock the door, when the 'Key' is collected and imputed into the;Keyring' if it's 'Keyone' the door that is connected to 'Keyone' will open when 'E'is pressed. However, the 'Keytwo' door will stay locked if the first key interacts with this until the player picks up 'Keytwo'. The video bellow demonstrates how both doors work with their respective keys.


I found this both easy yet time consuming but I'm happy with the result.To improve for next time I'd like to create a puzzle game with finding keys to make the game play more strategy based.

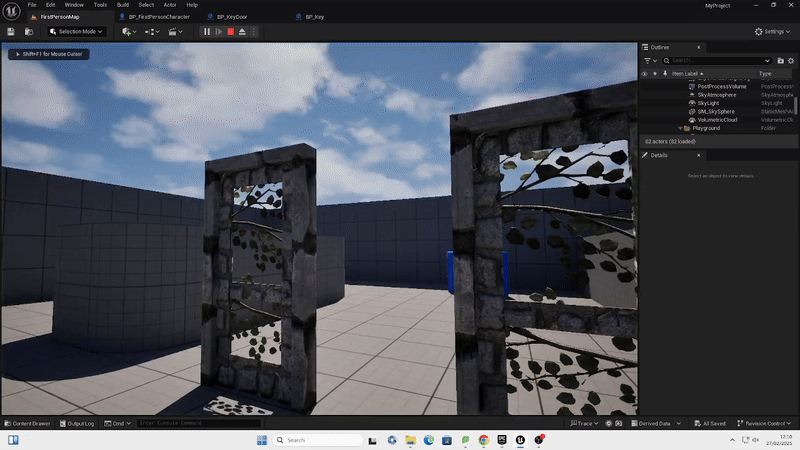
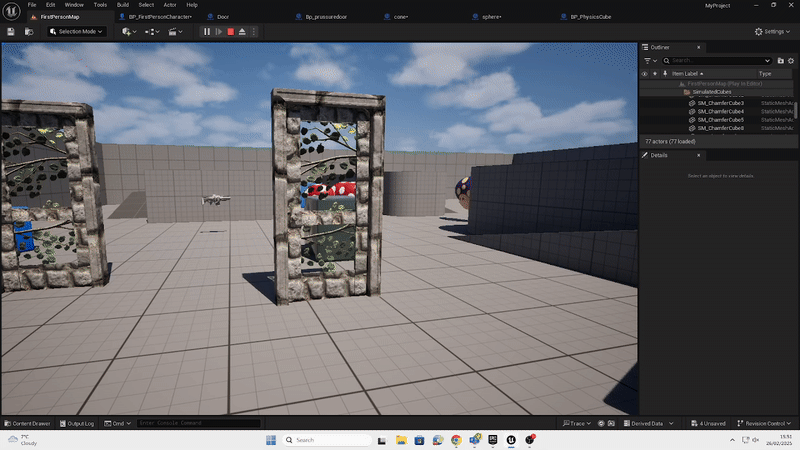
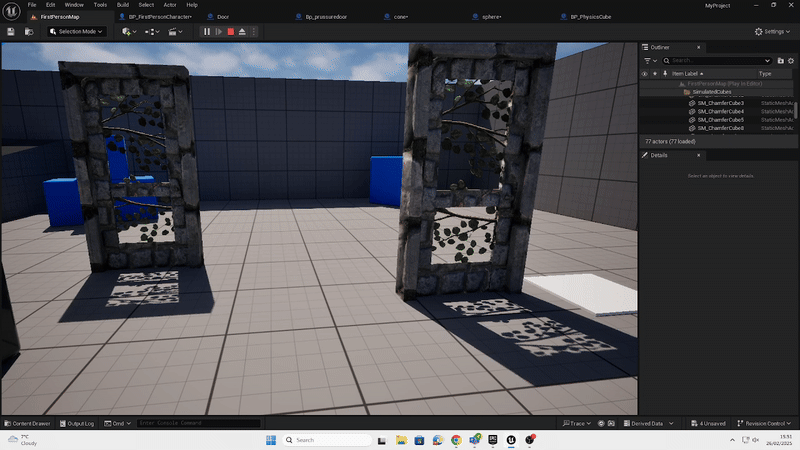
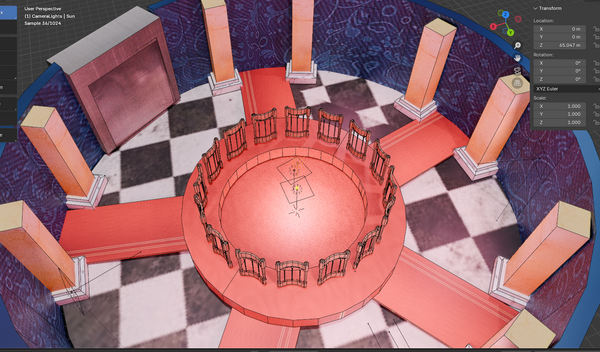
Blueprint Door
In this lesson we learnt how to make working doors that can be interacted with and use pressure plates.
Automatic Door
.
.
.


Pressure Plate Door
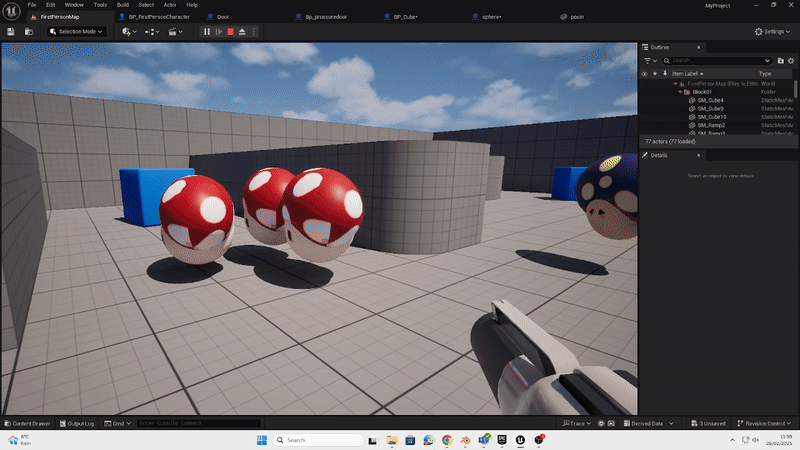
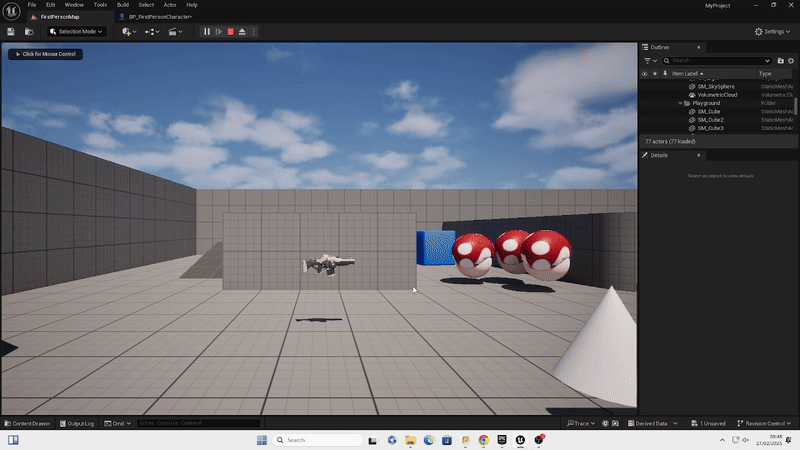
Growth Power up

Blueprint Power Up's
In today's lesson we learnt to make custom power ups to create new obstacles and ideas to make a 3D game

First to create a power up, I made a simple custom shape in blender (I modeled a mushroom for Mario). Then you import your blender mesh into Unreal and make it a static object and separate any texture painting if there's any. Then create a blueprint actor for the 'Grow Power Up' And input the following codes. Create an 'On Component Begin Overlap' tab and connect it's 'Other Actor' and itself to a 'Cast To BP_'. Connect it's 'As BP_' to a 'Target'/'Capsule Component' to another 'Target'/ 'Capsule Half Hight' and adjust its grow settings using the '+' tab. I set it to 100.00. This code will make it so the mesh when collided will grow your player as many times as you walk onto it. To make it despair after being interacted with you need to do the following. Connect the ' Cast To BP_' to a 'Set Capsule Half Hight' add the green pin '+' to it, connect the 'Capsule Component' to it's 'Target' and make 'Update Overlaps' true. Fully connect this tab to a 'Set Actor Hidden In Game' the fully connect that one to a 'Set Actor Enable Collision'. Connect to a 'Delay' tab for 1.0 second and on the completed tab add both the Set Actor Hidden In Game' the fully connect that one to a 'Set Actor Enable Collision'.Then it should work like the video below.

Speed Power up

I made a basic shape for a power up in unreal,(i made a simple cone). Then you import your blender mesh into Unreal and make it a static object and separate any texture painting if there's any. Then create a blueprint actor for the 'Speed Power Up' And input the following codes. Create an 'On Component Begin Overlap' tab and connect it's 'Other Actor' and itself to a 'Cast To BP_'. Connect it's 'As BP_' to a 'Target'/'Capsule Component' to another 'Target'/ 'Capsule Half Hight' and adjust its speed settings using the 'Set' tab. I set the speed to 120.00 This code will make it so the mesh when collided will increase the player speed when you walk onto it. To make it despair after being interacted with you need to do the following. Connect the ' Cast To BP_' to a 'Set Capsule Half Hight' add the green pin 'Set' to it, connect the 'Capsule Component' to it's 'Target' and make 'Update Overlaps' true. Fully connect this tab to a 'Set Actor Hidden In Game' the fully connect that one to a 'Set Actor Enable Collision'. Connect to a 'Delay' tab for 1.0 second and on the completed tab add both the Set Actor Hidden In Game' the fully connect that one to a 'Set Actor Enable Collision'.Then it should work like the video below.
Anti Power up


To create a power up, I made a simple custom shape in blender (I modeled a poisoned mushroom for Mario). Then you import your blender mesh into Unreal and make it a static object and separate any texture painting if there's any. Then create a blueprint actor for the 'Anti Power Up' And input the following codes. Create an 'On Component Begin Overlap' tab and connect it's 'Other Actor' and itself to a 'Cast To BP_'. Connect it's 'As BP_' to a 'Target'/'Capsule Component' to another 'Target'/ 'Capsule Half Hight' and adjust back to normal use the 'Set' tab. I set it back to 60.00. This code will make it so the mesh when collided will srink your player and set the speed back when you walk onto it. To make it despair after being interacted with you need to do the following. Connect the ' Cast To BP_' to a 'Set Capsule Half Hight' add the green pin 'Set' to it, connect the 'Capsule Component' to it's 'Target' and make 'Update Overlaps' true. Fully connect this tab to a 'Set Actor Hidden In Game' the fully connect that one to a 'Set Actor Enable Collision'. Connect to a 'Delay' tab for 1.0 second and on the completed tab add both the Set Actor Hidden In Game' the fully connect that one to a 'Set Actor Enable Collision'.Then it should work like the video below.
I found this task mostly east, The coding and creating a custom object was easy to learn but the whole process took quite some time. To improve I would like to make a small platformer to test my new power up's to see how well they work.
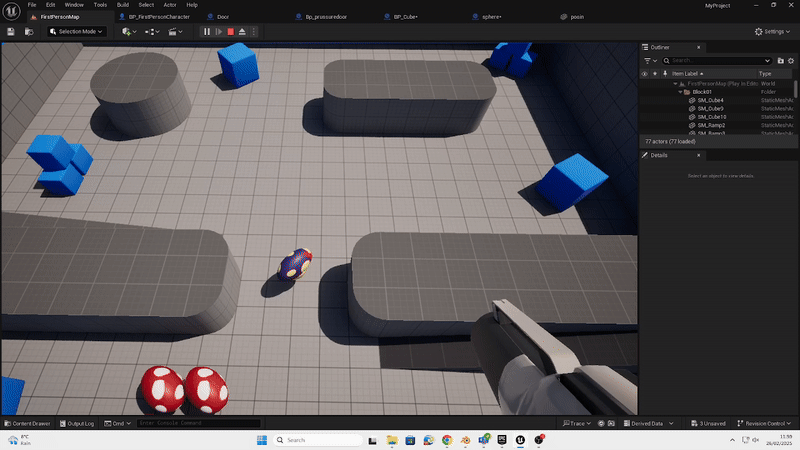
Moving Platforms
In today's lesson we learnt how to make platforms movable to create a more immerse game experience.

To create a moving platform you first have to make a 'blueprint actor' and inside add both a static mesh and a cube ( adjust to what seems fit). Next make a new vector and name it accordingly. Lastly on the main page of the cube you need to change the variables ; create a speed variable and name it as such, adjust the duration it moves and change the behavior type to 'ping pong' so it automatically goes back to it's original place. And now you have a base you can stand on ready for code to make it movable.

Following this code its states when the variable -Interp to Movement- is active the 'Control Point Position' will change top a new position according to the new adjustments. By doing this your cube should now move to were you adjusted the pivot points constantly
I found this task quite easy due to me planing it out and writing text boxes so I understand what is going on. To improve next time ill see if i can make it so you have to o an action ( press a key, go on a pressure plate) and then make the platform movable.


Slow Motion
Today I learnt how to implement slow motion to make my more dynamic.

To make a slow motion node you must go into your 'First Person' blueprint and add the following code. Use a 'Right Mouse Button' node and duplicate a 'Set Global Time Dilation' and connect one to the 'Pressed' key and the other to the ' Released'. Set one to a half speed and the other to the normal speed. Lastly, connect both to a 'Set' and double the first one and set the bottom as the same one. You should now be able to create a slow motion key as seen as below.
I found this part quite easy due to the simple implementation of codes easy reading and simple mechanics. To improve id like to see how this would work in a game.

3D RENDERS (BLENDER)

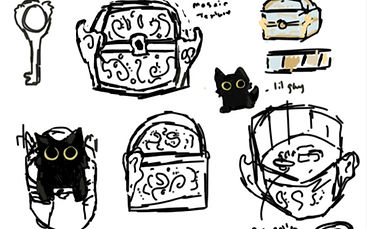
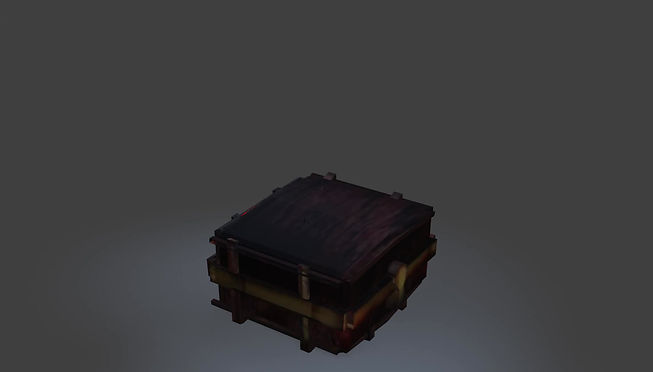
Treasure Chest Render
This was my fist time using blender and animating 3D. I learnt how to create models and texture paint them.

I found my first project quite hard due to it being my first time in the program. To improve for next time I will save my meshes to keep my texture painting work. And I will extrude one cubes edges to create texture instead of putting extra cubes onto the base.
The concept art for the possible game featuring the chest. The gimmick is that theirs a good and bad chest. The one I rendered was the bad one were you die after getting the wrong key by making bad dissension.
To start I used a cube and learnt how to scale, rotate and move the object, then I used other cubes to create the pattern around the chest. I duplicated the base and extruded the bottom to make a lid. I then learnt to extrude edges and made the key socket to the base and connected it all. However, I ran into saving issues with the texture paint were each time I loaded the save it would undo all my work. Now I know that i have to save the meshes individually. I then used cones to create spikes and added a metal and wood texture to my build. I then used some animation skills i have to animated the sentient chest slowly opening and closing and a small detail of the person rattling the chest when it closes.
Render

Animated Chest


Progress Pictures


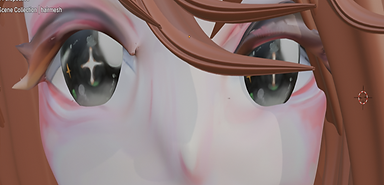
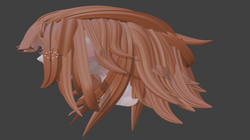
I first started with a cube and subdivide it by 3 or more and then make edits on the cube to make sculpting easier. Eg: making a chin jawline. Then i began to use the grab and moved the cube into a head like shape and smoothed it out. I then used the re mesh button to put it in placer and smooth it out. I then got more cubes to make the ears and neck and connected them after getting a basic shape. I then scrapes holes out of the eyes sockets and mouth to create depth. I then used the draw and grab tool to create her 3D eyelashes and nose. I then used curves to create the hair and modeled them into the shape I wanted to duplicate and fill in her hair. I then created her hair pin with the same process using the cube and molded it into petals. Finally i re-meshed and smoothed it out and added two spheres for eyes and my main sculpting was finished


Sculpting

Minori Hanasato model for reference
My goal was not to create a one to one from her official model but my own unique one with the shading style a kin to Spider - Verse
I then stared to UV and texture paint the face. I used my reference board on how to emulate the style of my choice. I added a base color for the skin and cheeks, then added detail on the eyelashes and mouth.Next i used the techniques from the Spider-verse style to create a watercolor like texture on her face- this was done by adding hue's of blue, yellow and purple to the red shading. I added the base color to the hair and created depth by airbrushing the back with a light blue for contrast. Finally. I painted her hair piece and added a lot of detail in her eyes. Her eyes were the hardest to do because i wanted to captivate and happy emotion in them ; so I added the small shine in her eyes to indicate that.
Finished piece
Art style inspiration


My main art style focus was the Spider -Verse style. Using it bold colors and comic book like texture and style. I wanted to emulate to more watercolor style (like Gwen).I did this by adding hue's of cool colors to contrast the reds and made sharp out lines on her face to differentiate the nose, eyes and chin to create that comic book style.
 |
|---|
 |
 |
 |
 |
 |


To conclude, I enjoyed this project and am happy with my result. After, texture patting I did one last tweak of my model I squinted her eyes to captivate that happiness more and did one last smoothing out. One thing I struggles with was the mouth position so for next time I'll plan out a mouth structure to make it easier to do. I like the way I textured her and do think I did emulate the art style of Spider-Verse well in this model.I have learned to sculpt and create curves for hair during this project.
